Table of Contents
Single Sign-On Configuration
Setup and manage SSO configurations

Updated
by Help Guide
What can you do
The Single Sign-On (SSO) page enables users to add and manage SSO configurations. Users can filter the table, add new SSO providers, perform bulk actions, and edit existing configurations.
The SSO Table displays key details, including SSO Provider, Last Update, and Updated By columns.
You will need Manage User Accounts and Roles permission to perform this operation.
Add a new SSO Provider
User accounts contain general information, global permissions, catalog permissions, and user settings. Instructions to add a new user are below.
- Click on Settings Icon (⚙️) --> Admin
- Go to Accounts + Permissions -> Single Sign-On Configuration
- Click on Add New
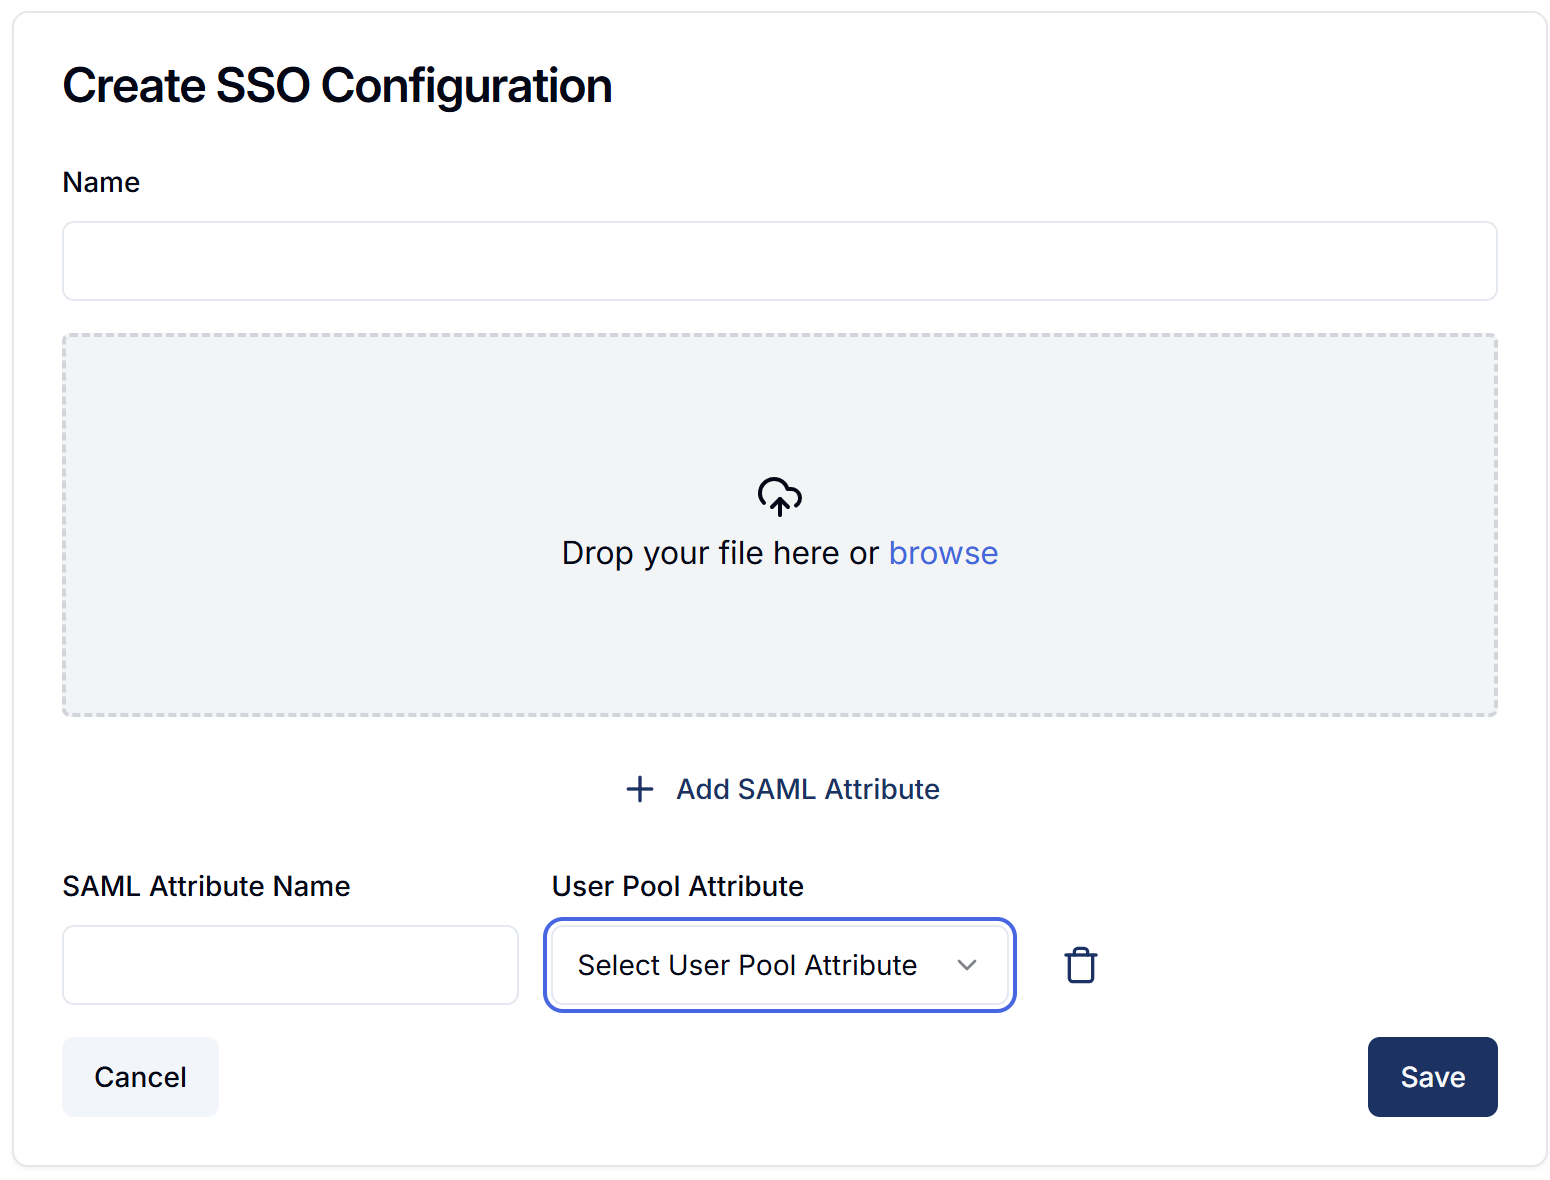
- Enter Name
- Select the XML file which will be used for mapping
- Click Add SAML Attribute
- Enter SAML Attribute Name
- Select the User Pool Attribute - options are name, preferred username, email, phone
- Repeat these steps if required
- Click Save
Edit Single Sign-on configuration
You may edit a sign-on configuration from the Admin menu. Instructions are listed below.
- Click on Settings Icon (⚙️) --> Admin
- Go to Accounts + Permissions -> Single Sign-On Configuration
- Find the SSO Configuration that you want to edit
- Click on Ellipses --> Edit
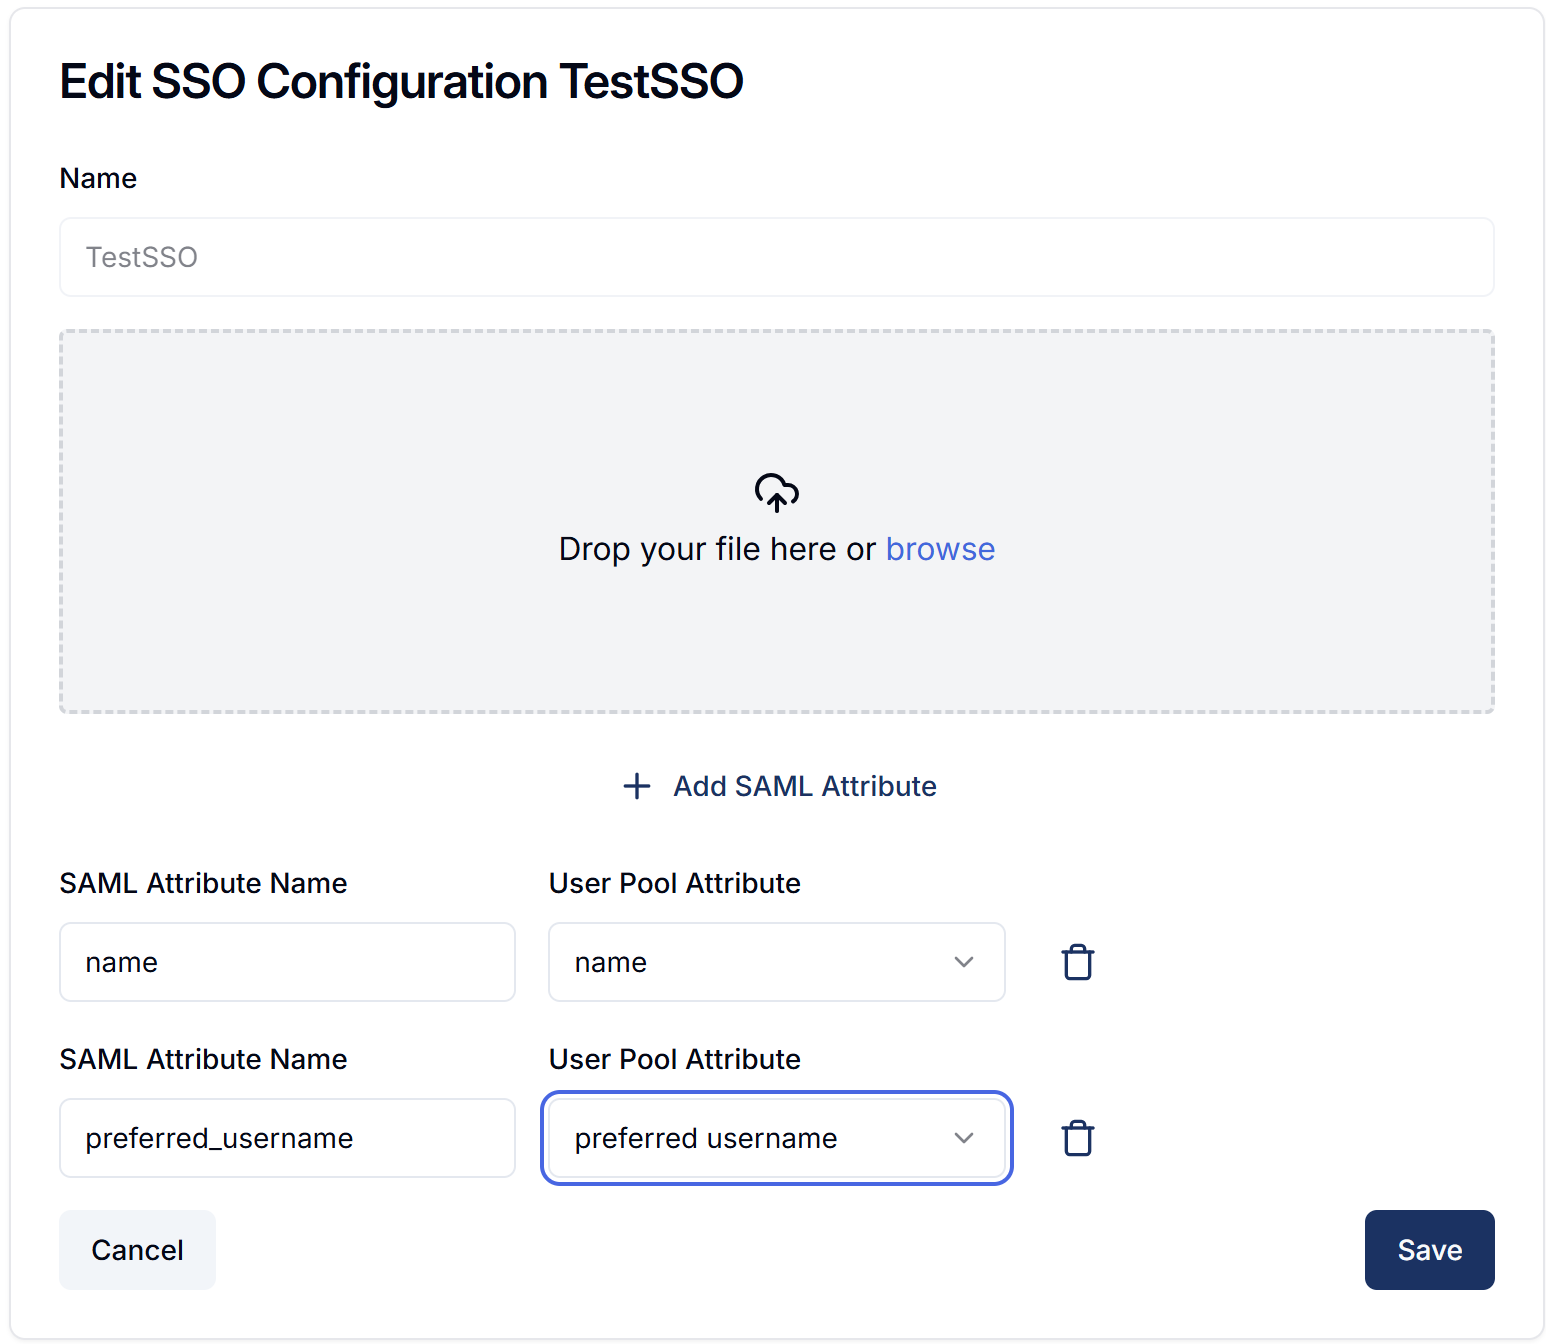
- Update the required elements
- Click Save
Delete Single Sign-on configuration
You may edit a sign-on configuration from the Admin menu. Instructions are listed below.
- Click on Settings Icon (⚙️) --> Admin
- Go to Accounts + Permissions -> Single Sign-On Configuration
- Find the SSO Configuration that you want to edit
- Click on Ellipses --> Delete

- Click Delete
When a configuration is deleted any existing user associated to the deleted SSO is set to inactive.
How did we do?
Everyone Role
Training Mode